Overview
If you are a large organisation, reseller or managed service partner you can utilise the hierarchical nature of Cloud Ctrl to enable your customers to get direct access to thier own spend information directly in the Cloud Ctrl portal. Combined with our whitelabling options you can provide your customers a customised portal experience.
The Customer Management feature allows any data loaded into your customer account to be filtered, adjusted (price changes etc) and shared with your customers.
Customers can:
- be presented usage data shared from the parent, which may be a subscet of a shared account, be marked up or discounted.
- have a portal account in a different currency to the parent.
- have additional cloud account connections to vendors directly.
- have restricted access to platform permissions and features, controlled by the parent.
Note
The customer management features are only available to customers on an Enterprise subscription.
Managing Customers
If your Cloud Ctrl subscription includes Customer Managment you will see a Customers menu group. Navigate to the Manage option to view / add / or modify you customers.
Adding a Customer
To a customer click Add Customer and enter a Customer Name and Currency for the customers account. The currency is the display currency for the customer, all spend regardless of the currency it is purchased in will be displayed in the display currency.
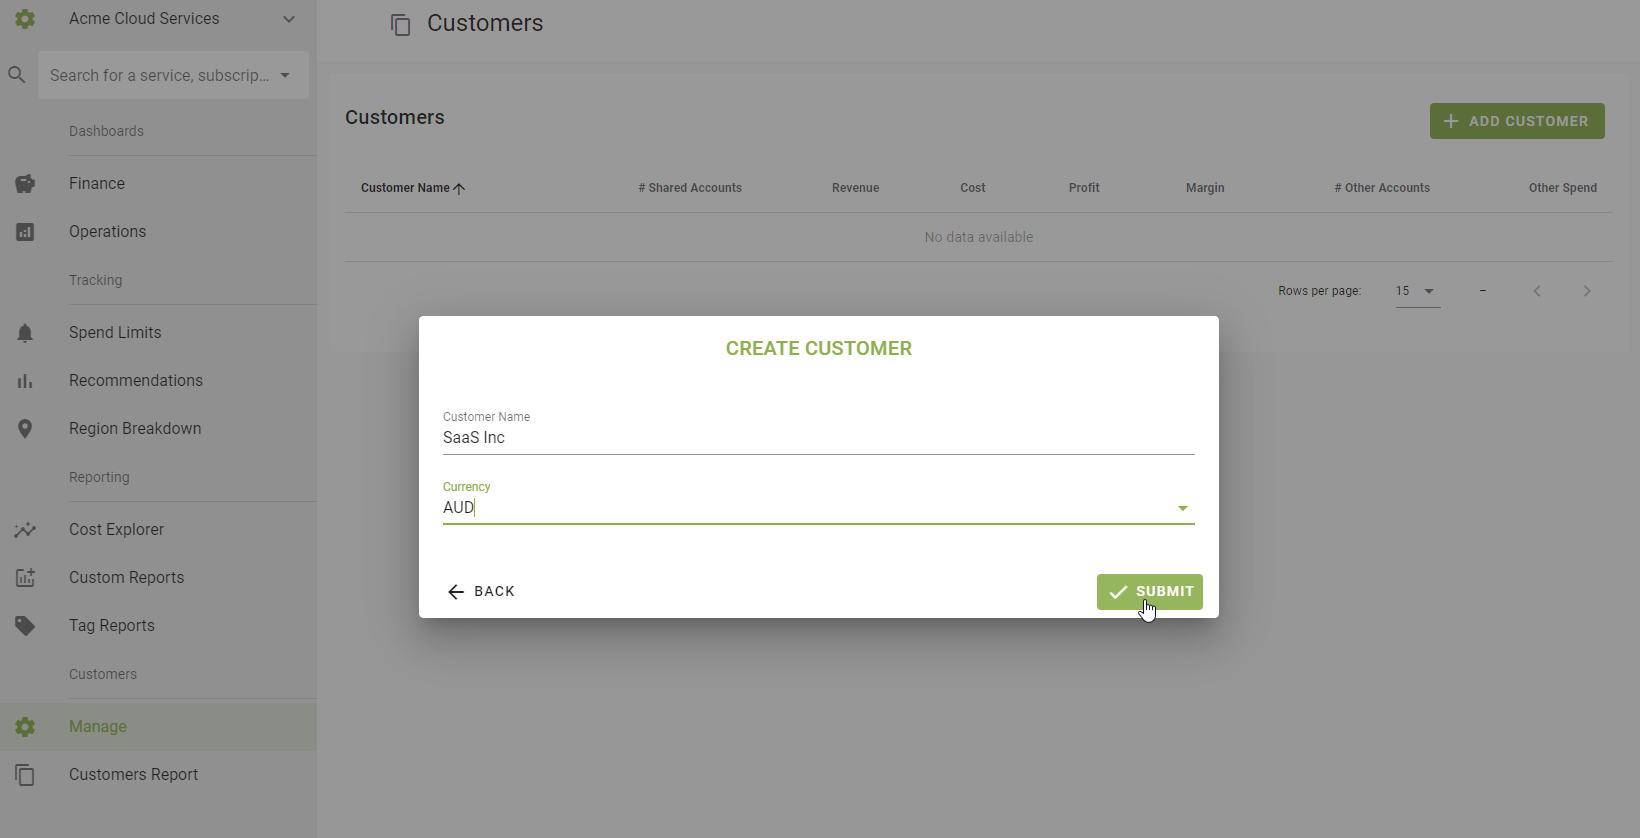
Note
Once set the Currency value cannot be changed.
Sharing data with your customer
If you are reselling cloud, you are a managed service provider or a just a large organisation, it is important to provide the best visibility of cloud consumption to your customers.
With the shared data feature you can share usage data from any of your cloud accounts to a customer.
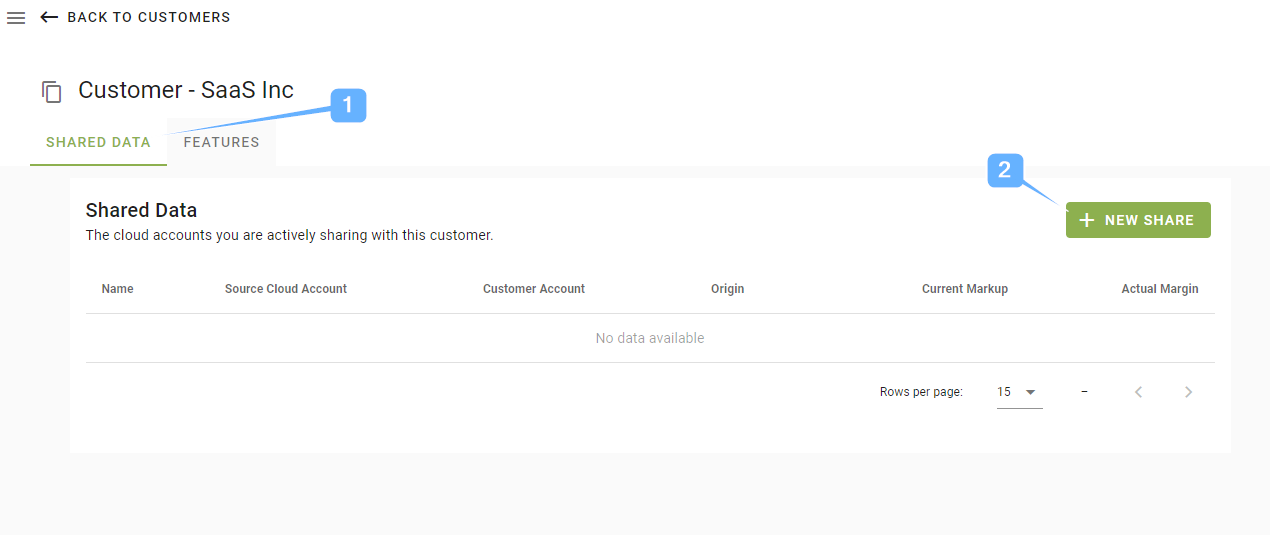
To create a share browse to the Customer from the Customer Managent link and ensure you are on the Shared Data tab (1), then click the New Share button (2) to start the share wizard.
Set share details
On the first step of the share wizard you need to select the source cloud account you want to share data from, and the customer who you want the data to be shared with.

Setup pricing
As part of the share process you can modify the pricing that is displayed / calculated for your customers to see.
- You can choose to use any FX rate overrides that have been setup in the source Cloud Account.
- You have the option to select the Price Basis, this is the price you want to use as the base for the new price calculation. This defaults to Base Cost (which is your cost price), some vendors will only have this option.
- You can select a previously defined action to manipulate inbound usage.
- You can also adjust the price by a markup percentage, this can be a positive or negative number and is effecting for all usage from the Effective From month onward.
- You also have the option to setup new markup percentages to become effective in the future, allowing for incremental increases over time.
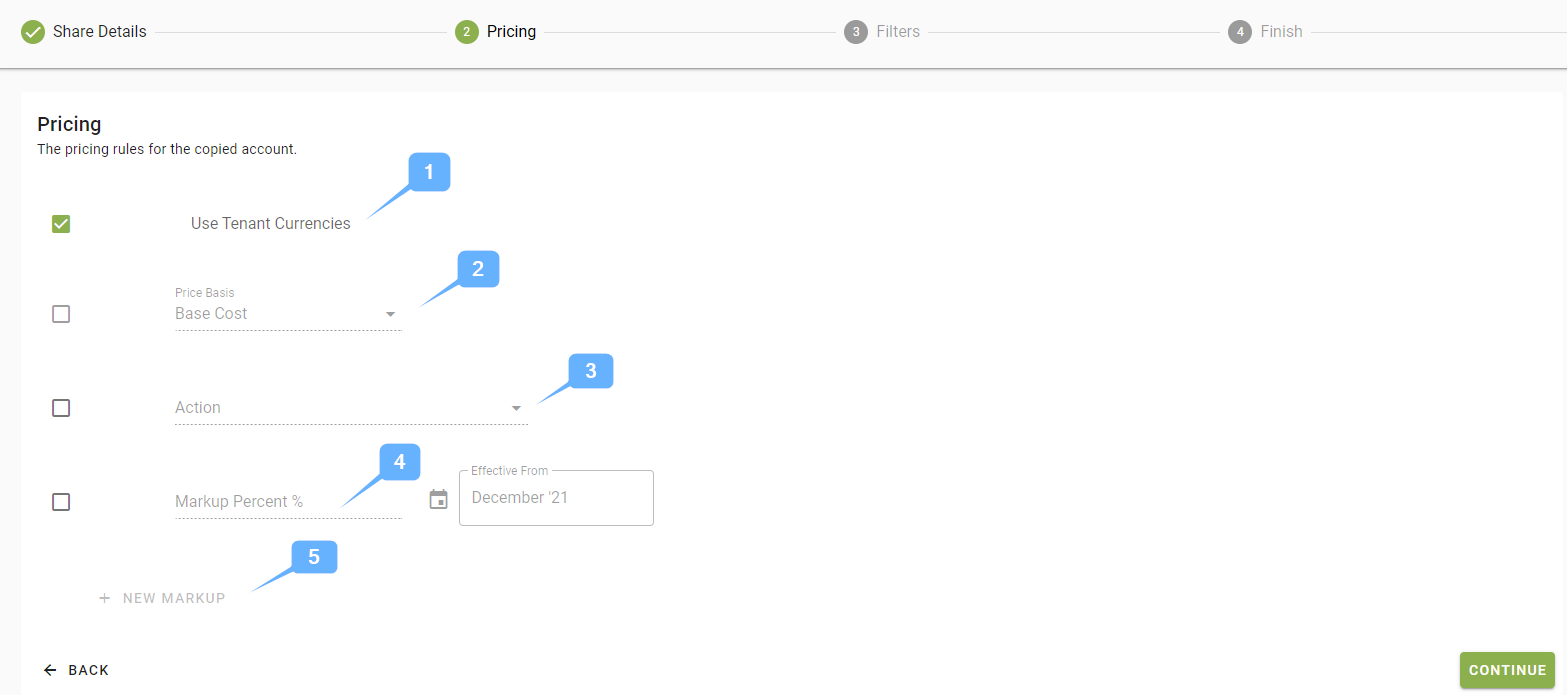
Note
The markup percentage can also be set to a negative value if you are offering a discount.
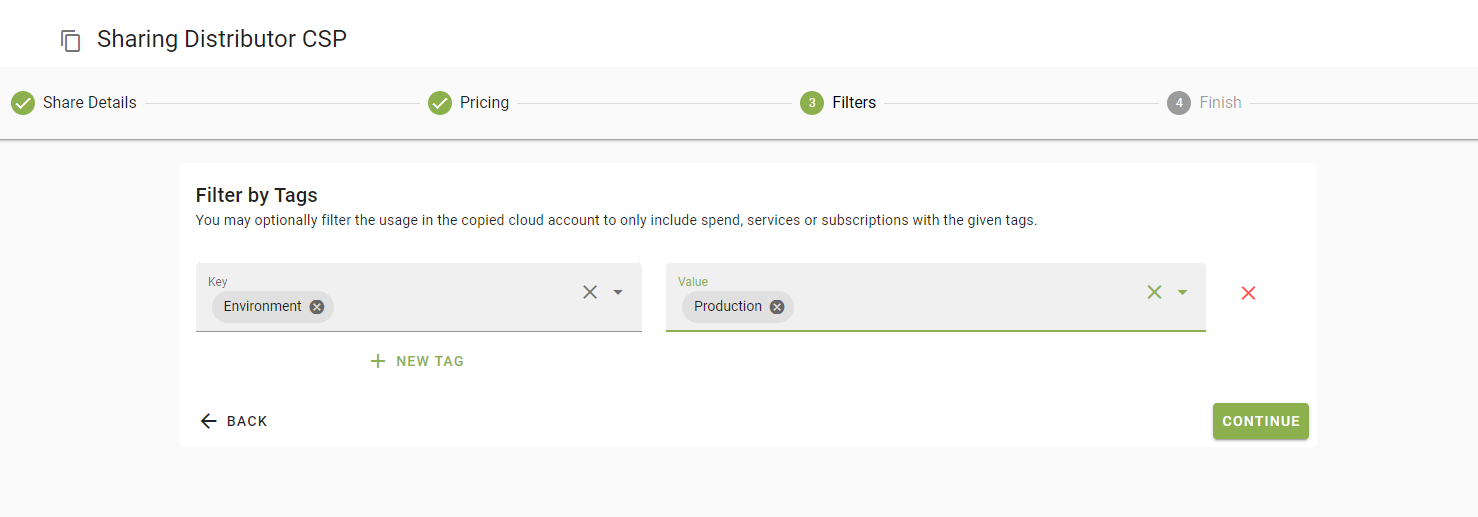
Setup filters (optional)
Filters allow you to restrict the data that is shared to data that contains one or more tags,
Final steps
The final step is to setup a name for the Cloud Account as it will appear in your customers account.
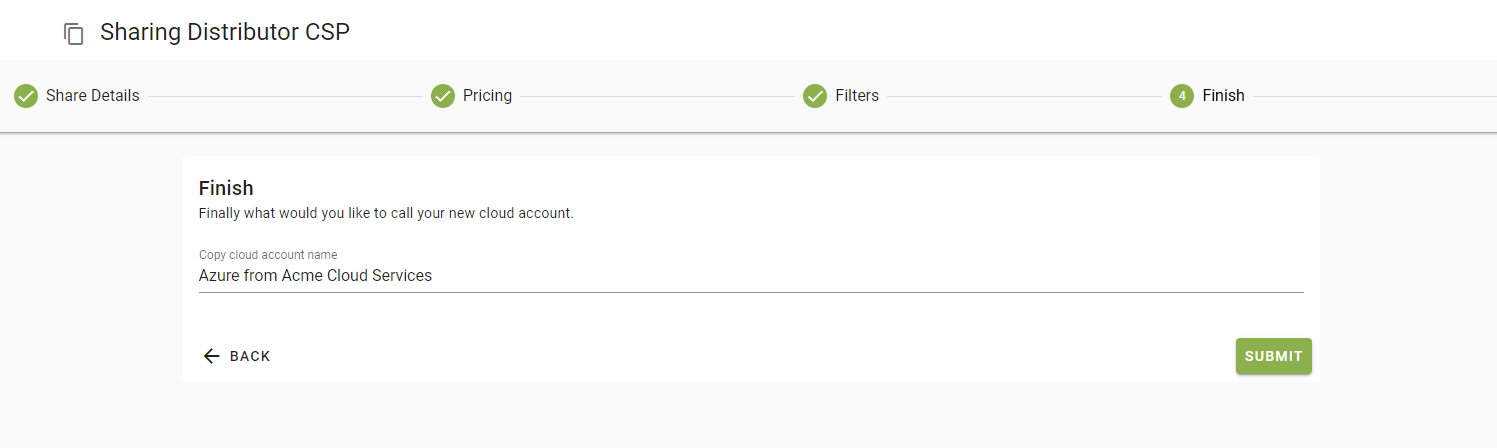
Note
After you submit it can take 10-60mins for the data to finish loading into the customer account.
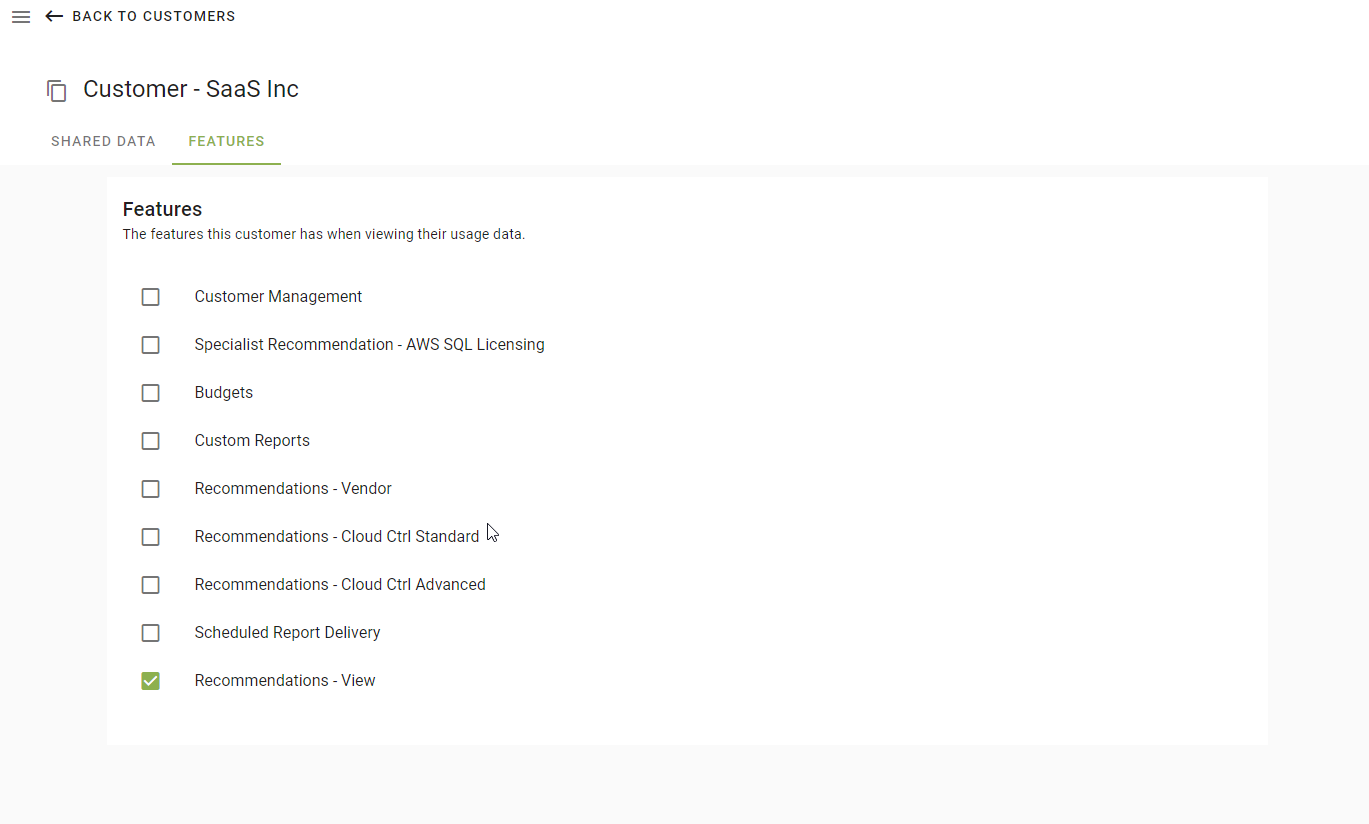
Configuring customer features
When Customer accounts are initially created they have a limited set of Cloud Ctrl features available to them. The features that they have access to can be modified on the Features tab of a customer, in the Customer Management section.
Enable a feature for your customer by checking the check box next to the feature you wish to enable. To disable a feature uncheck that features check box.