Budgets
The budgeting feature is designed to streamline resource and financial management across various public cloud vendors. This functionality simplifies the complexity of monitoring and controlling resource consumption and cost in a dynamic cloud environment. This document explains how to utilize this feature by creating Custom Views and setting Budgets, providing a walkthrough for optimal utilization of these powerful tools.
Creating Custom Views

Custom Views are a cornerstone of the budgeting feature, facilitating resource grouping based on your unique needs. This functionality allows users to define sets of filters to monitor specific resources or subscriptions. It caters to diverse requirements, from targeting resources tagged for a particular customer to focusing on resources under a specific cloud provider's subscription.
Step 1: Navigating to Custom Views Screen
From the main dashboard, navigate to the "Custom Views" screen using the sidebar menu. This page is designed to offer an intuitive user experience, with a clean layout and easy-to-understand controls.
Step 2: Creating a Custom View
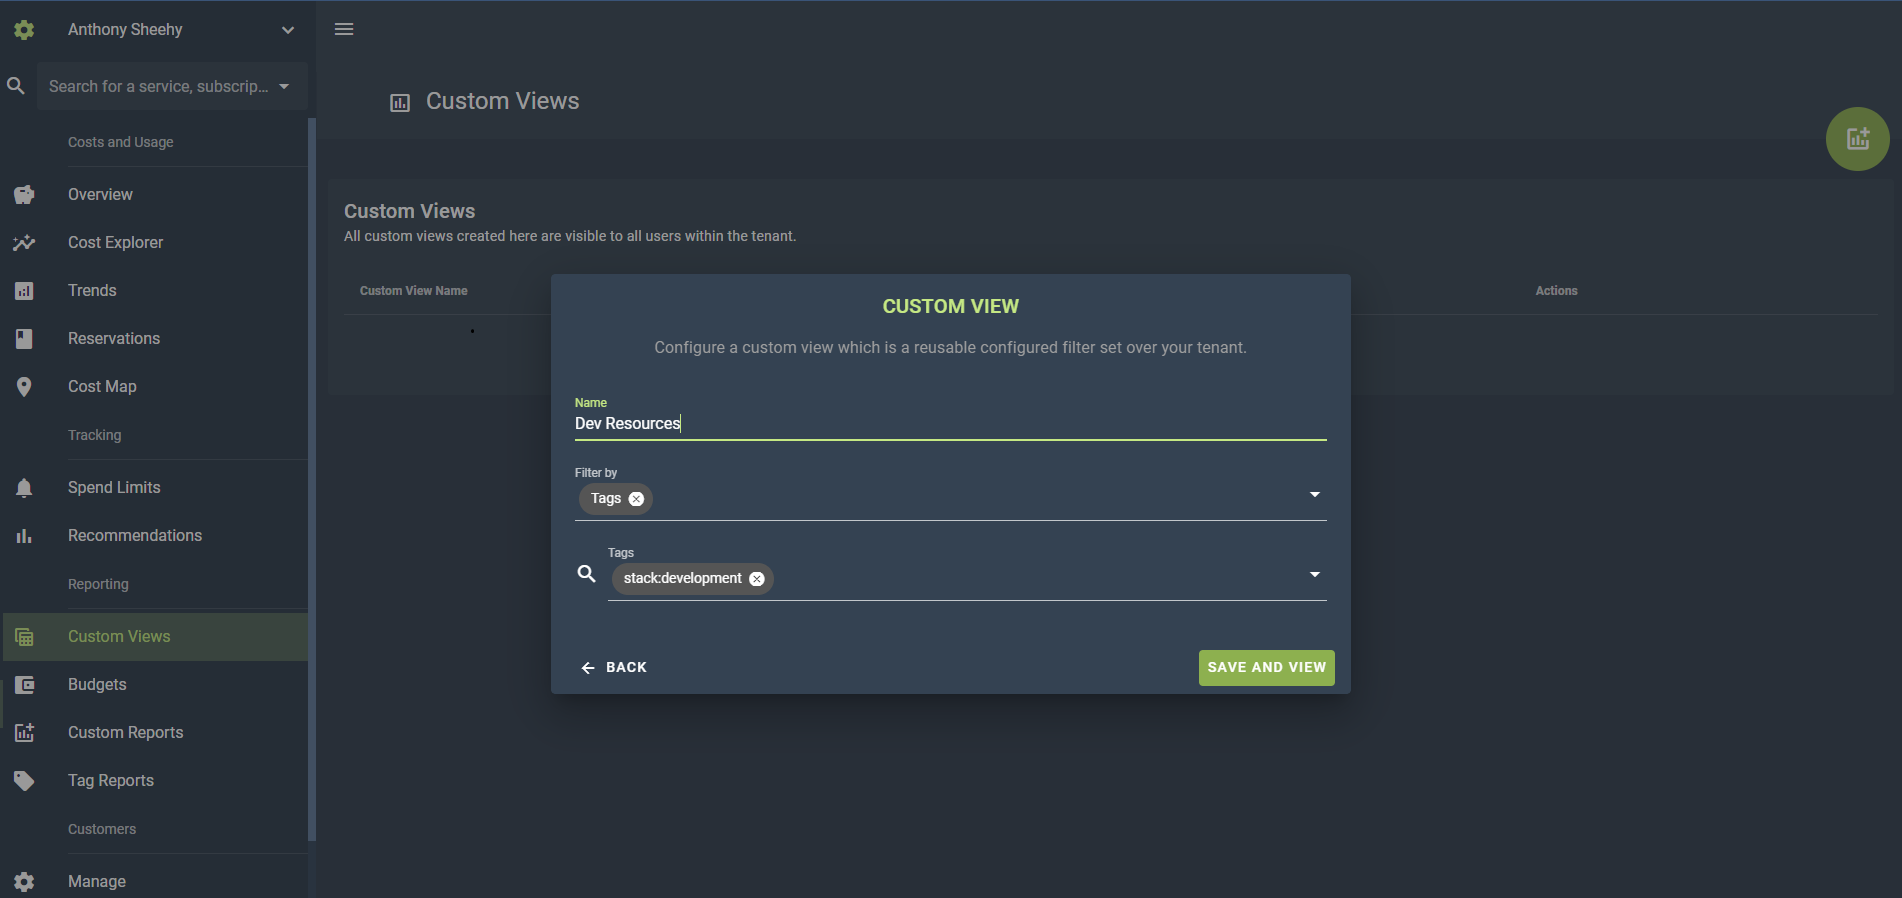
Click the "Create" button to start configuring a new Custom View. This action opens a dialog box where you'll define your custom view.
Step 3: Naming the Custom View
The name you assign to your custom view should ideally represent the set of filters it encompasses. This will ensure easy identification later on when creating budgets or analyzing data.
Step 4: Defining Filters
Define the filters to capture the specific resources you want to monitor. Filters provide a high degree of customization - they can be set based on resources, subscriptions, connections, provider types (Azure, AWS, etc.), tags, regions, and more. By precisely tuning these parameters, you can shape your custom view to align with specific monitoring requirements.
Once you've defined your filters, click on 'Save' to store the Custom View. You can repeat this process to create multiple Custom Views as needed.
Setting Budgets
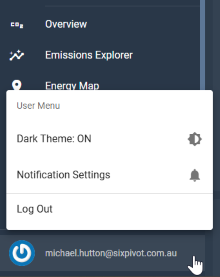
With the Custom Views in place, the next step is setting up Budgets. Budgets provide granular control over resource consumption costs, directly tied to your custom views. This flexible approach allows you to set multiple budgets for each custom view, accommodating different aspects or timeframes of cloud usage. Notifications are sent when Tenant spend is projected to exceed 75%, 90%, and 100% of the budgeted amount. A user can unsubscribe from all alerts (Budget and Spend Limit), using the 'Notification Settings' screen, accessed through the user menu, available in the bottom left of the screen.
Step 1: Navigating to Budgets Screen
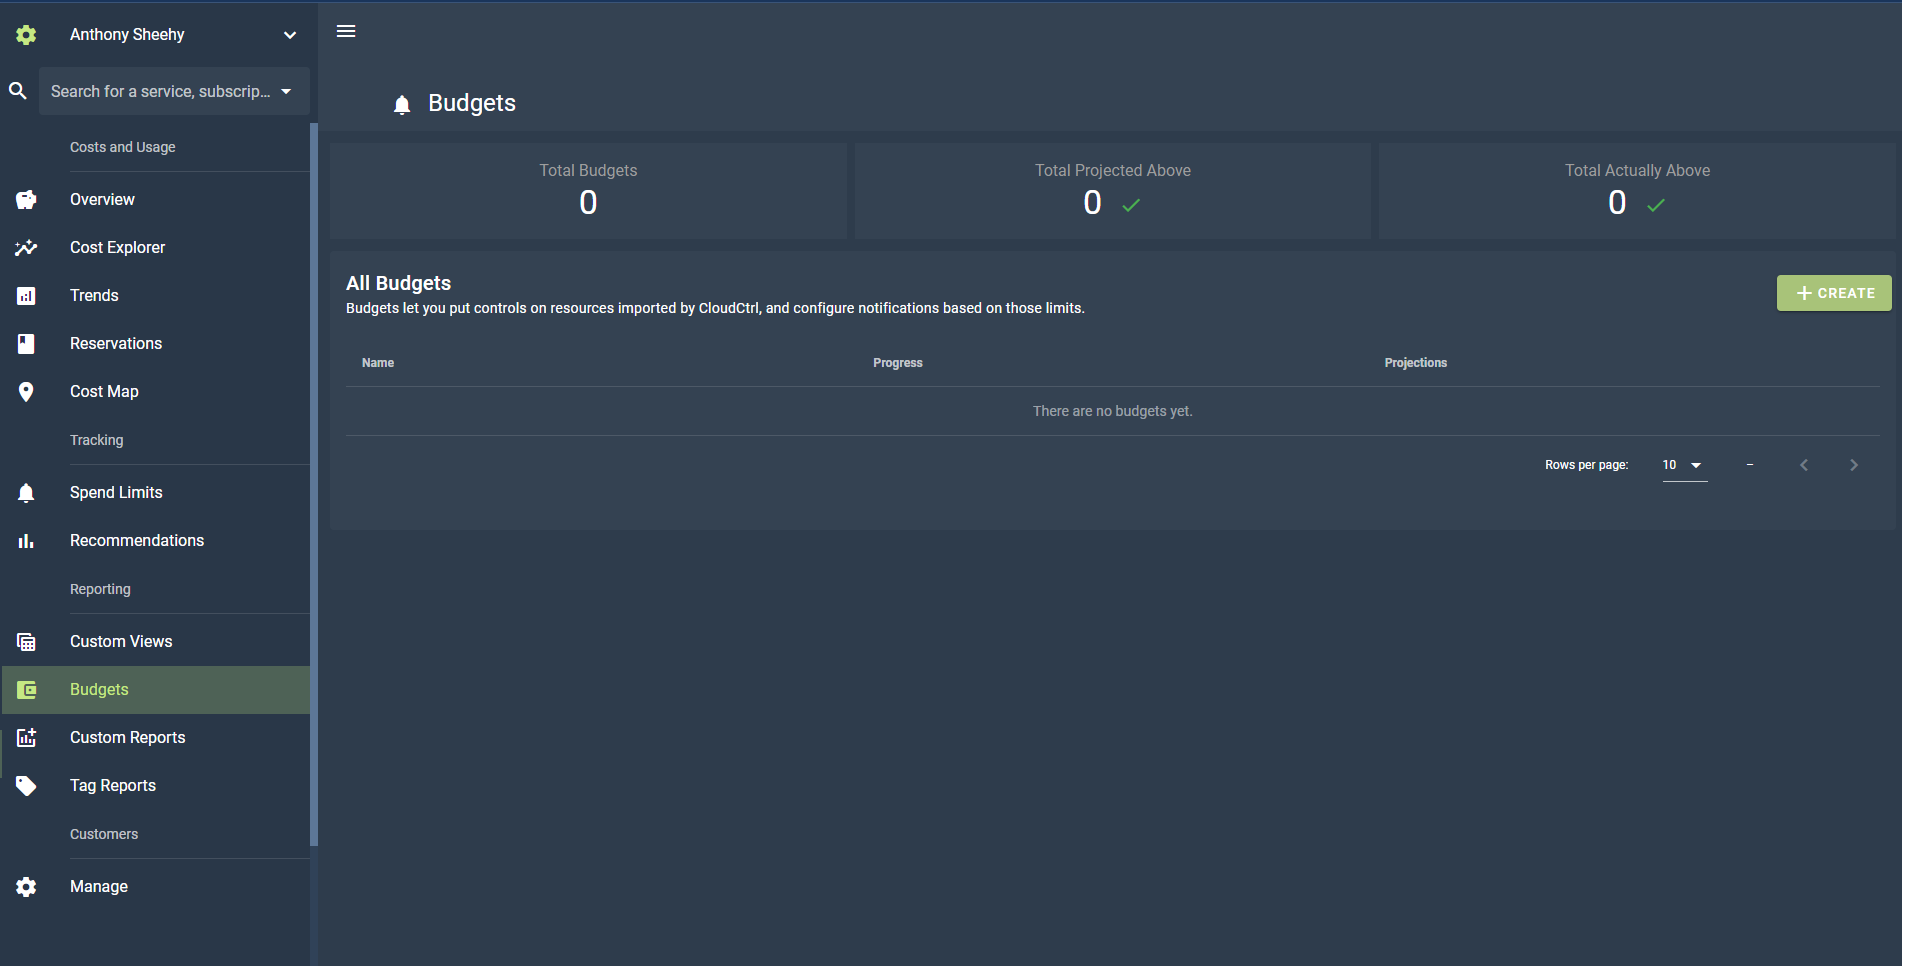
From the main dashboard, navigate to the "Budgets" screen through the sidebar menu. Here you can create and manage all your budgets.
Step 2: Creating a Budget
Click the "Create" button to start setting a new Budget. A dialog box will appear prompting you to configure your budget.
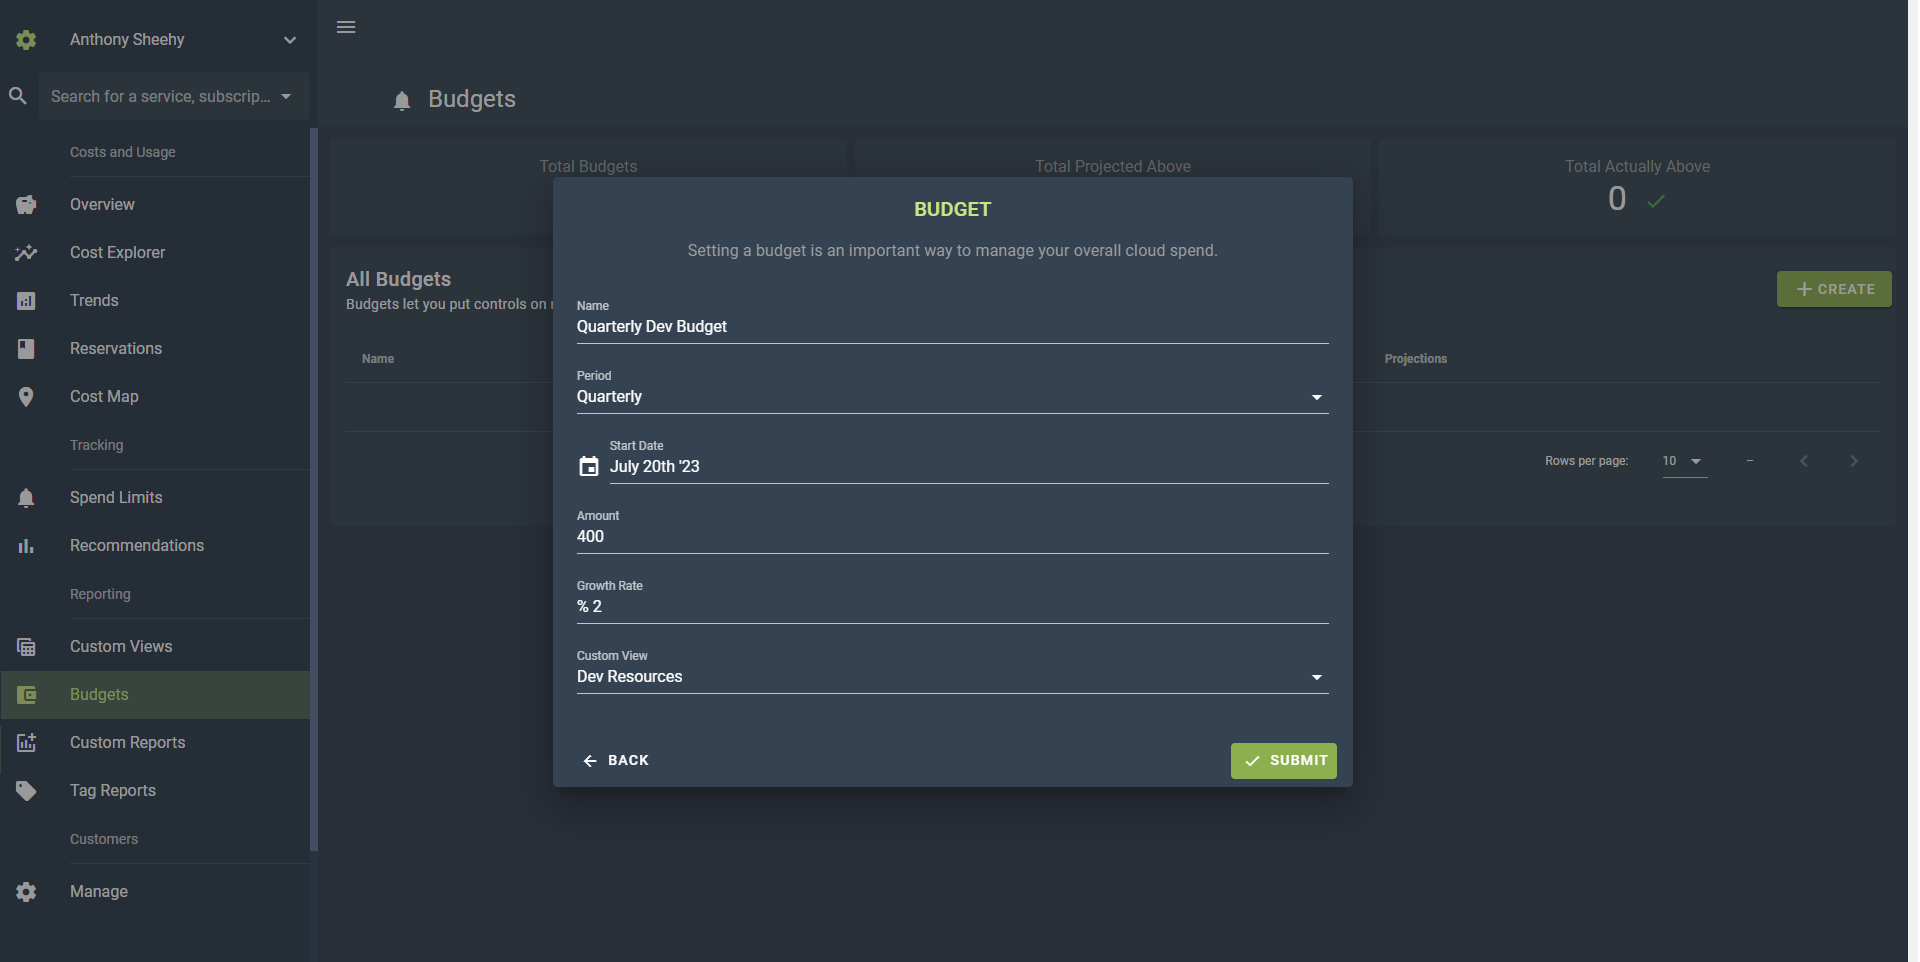
Step 3: Selecting a Custom View
Choose the Custom View that this budget will apply to. This determines the scope of resources that the budget will track.
Step 4: Naming the Budget
Assign a descriptive name to your budget. The name can reflect the nature or purpose of the budget, facilitating easy identification and management later.
Step 5: Defining the Budget Window
The Budget Window represents the duration for which the budget applies. This could be weekly, monthly, quarterly, or yearly. Select the option that best fits your budgeting requirements.
Step 6: Setting the Budget Start Date
Determine when the budget calculation begins. This could be as immediate as today or set for a future date. This allows for advanced planning of resource usage.
Step 7: Setting the Budget Amount
Input the budgeted amount for the chosen time window. This sets the financial limit for the specific period and aids in cost control.
Step 8: Defining Growth Rate
The growth rate represents the percentage by which your budget increases over each period. For example, if you set a 2% growth rate for a weekly budget window, your budget will increase by 2% every week. This aids in future budget planning.
Once you've filled in these details, click 'Save' to store the Budget. You will receive warnings when the system predicts that a budget will be exceeded within the period, and another alert when the budget is indeed surpassed. This allows for effective cost management, giving you the chance to intervene and adjust as needed.
Conclusion
Budgeting provides the control and insight needed to manage cloud resources efficiently. By offering the flexibility to customize budgeting parameters and the advantage of data-driven projections, it empowers users to optimize resource allocation and make proactive financial decisions. Start utilizing it today to gain better control over your resource usage and budgeting.