Amazon Web Services
The first thing you need to do before being able to ingest AWS billing data into Cloud Ctrl is to configure Cost and Usage Reports (CUR) 2.0 in the AWS Console. Important: Please make sure to use the Data Exports page, found under Billing and Cost Management > Data Exports in the AWS Console. We recommend setting up a data export as soon as possible as these reports only begin reporting from the day you created them on-wards.
When you configure a Cost and Usage Report (CUR) 2.0 you nominate an S3 Bucket to deliver them to. Cloud Ctrl then consumes the report data from this S3 Bucket and requires no additional permissions.
Configure Cost and Usage Reports
AWS Cost and Usage reports are managed in the Billing and Cost Management console. If you don’t see this view, look for “Cost and Usage Analysis” in the left sidebar of the Billing console and select Data Exports from there.
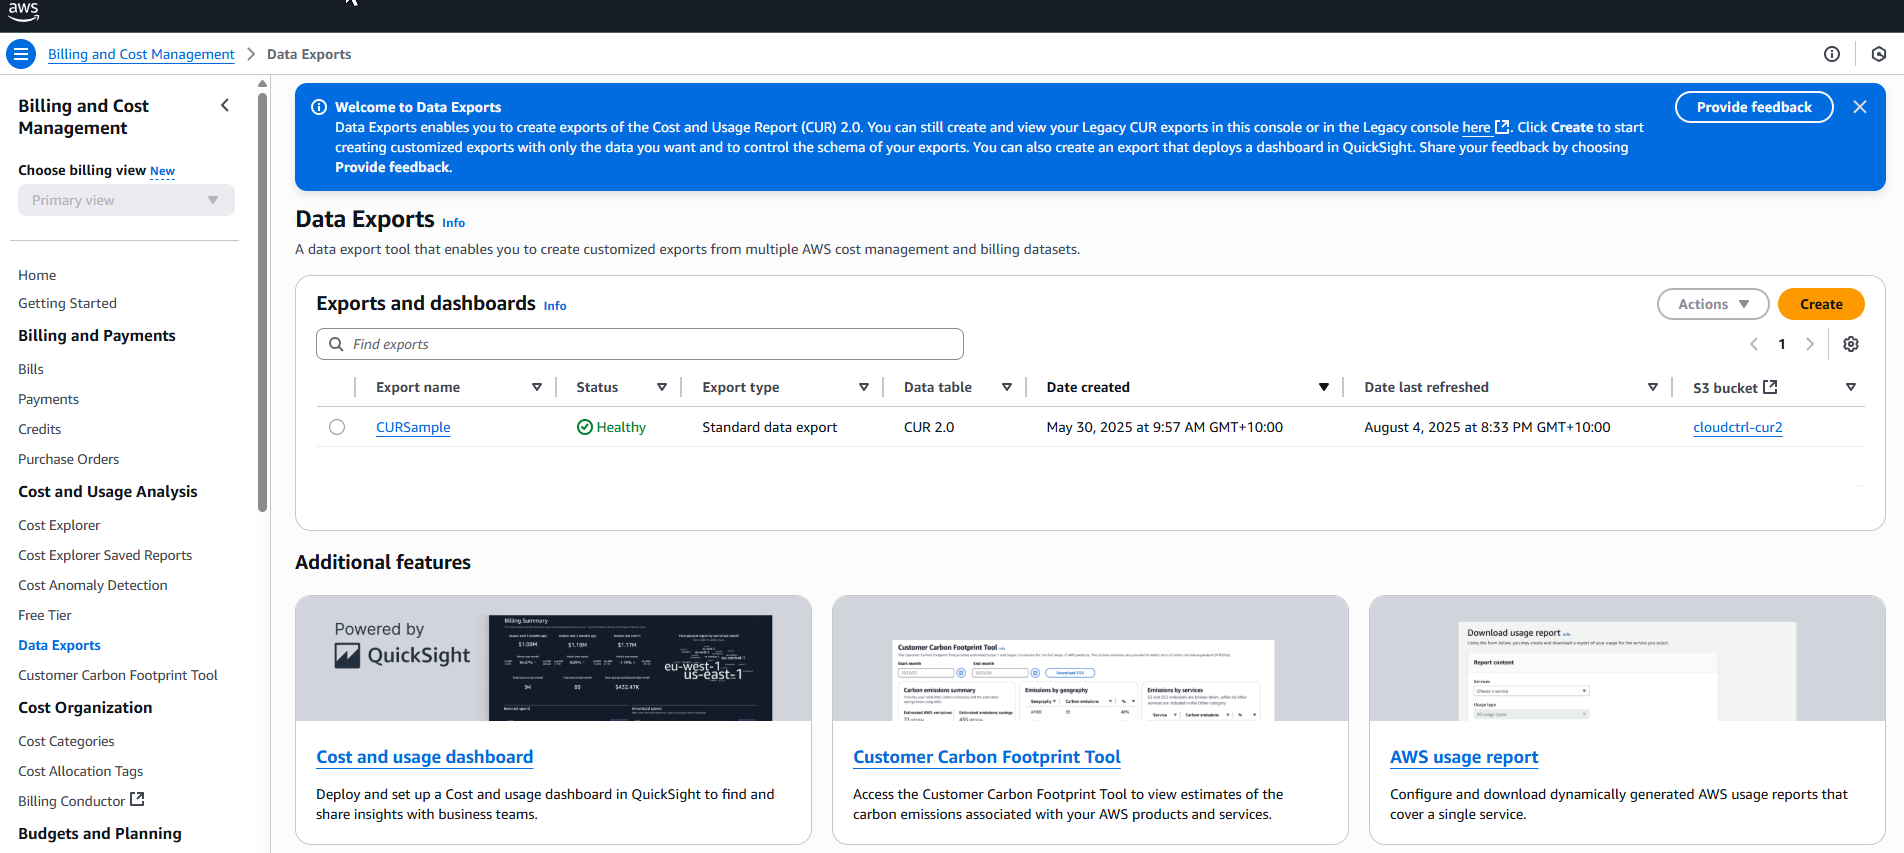
Click the Create report button.
Choose the "Standard data export" option, and give the export a name.
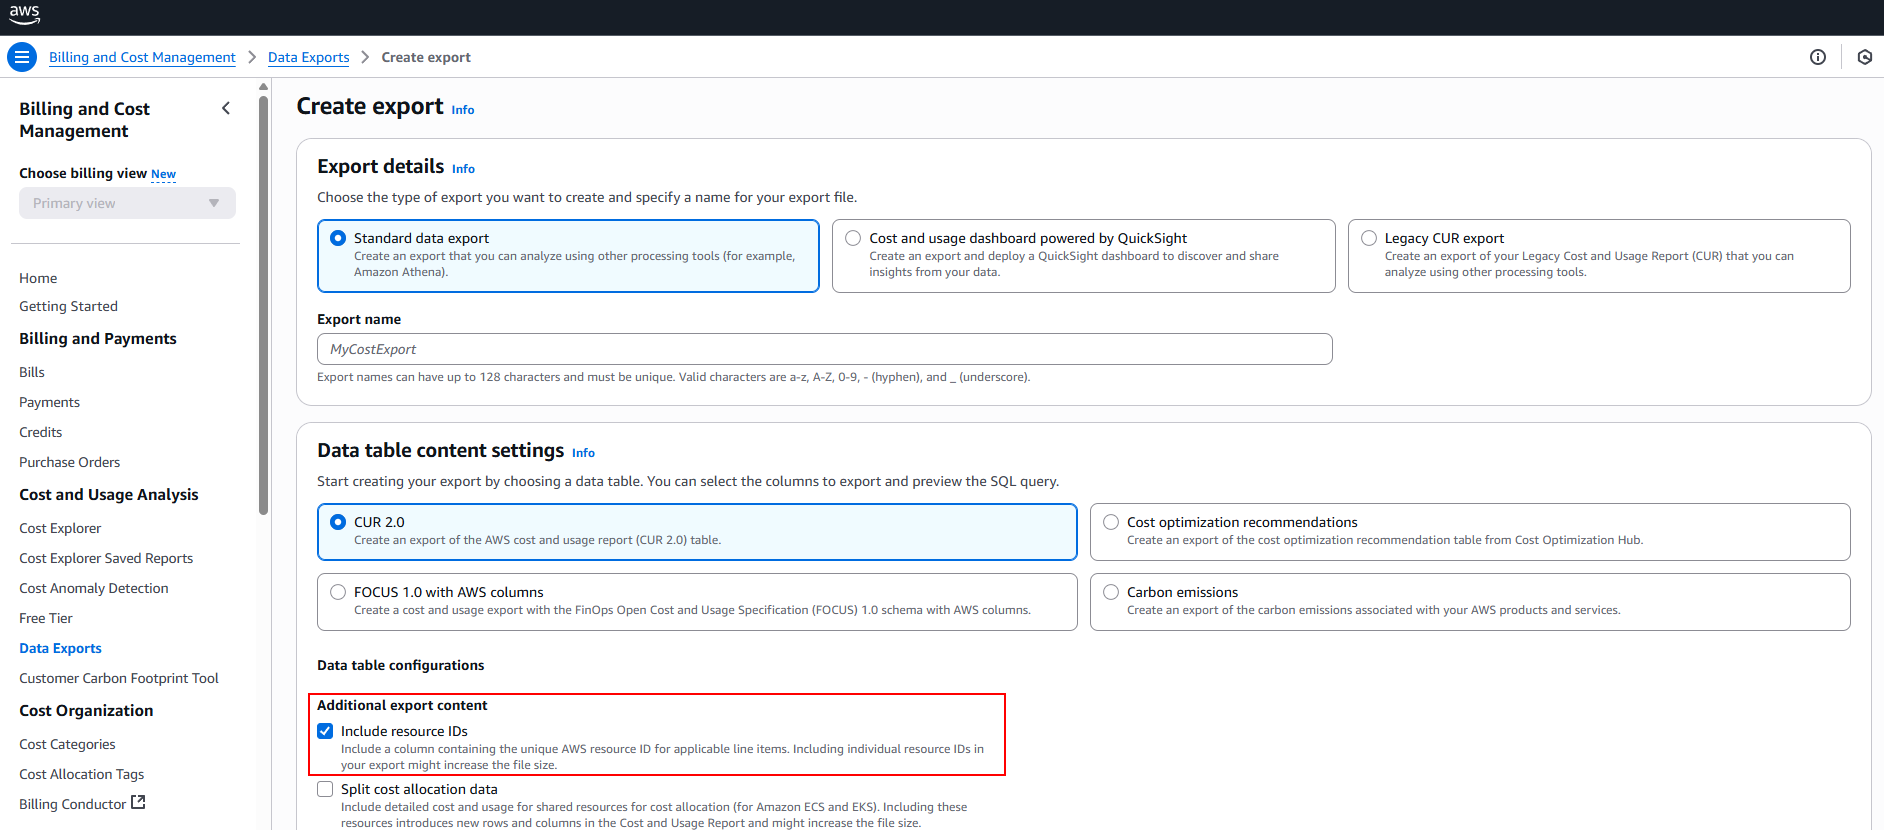
Choose the "CUR 2.0" option, and make sure to check the Include resource IDs option.
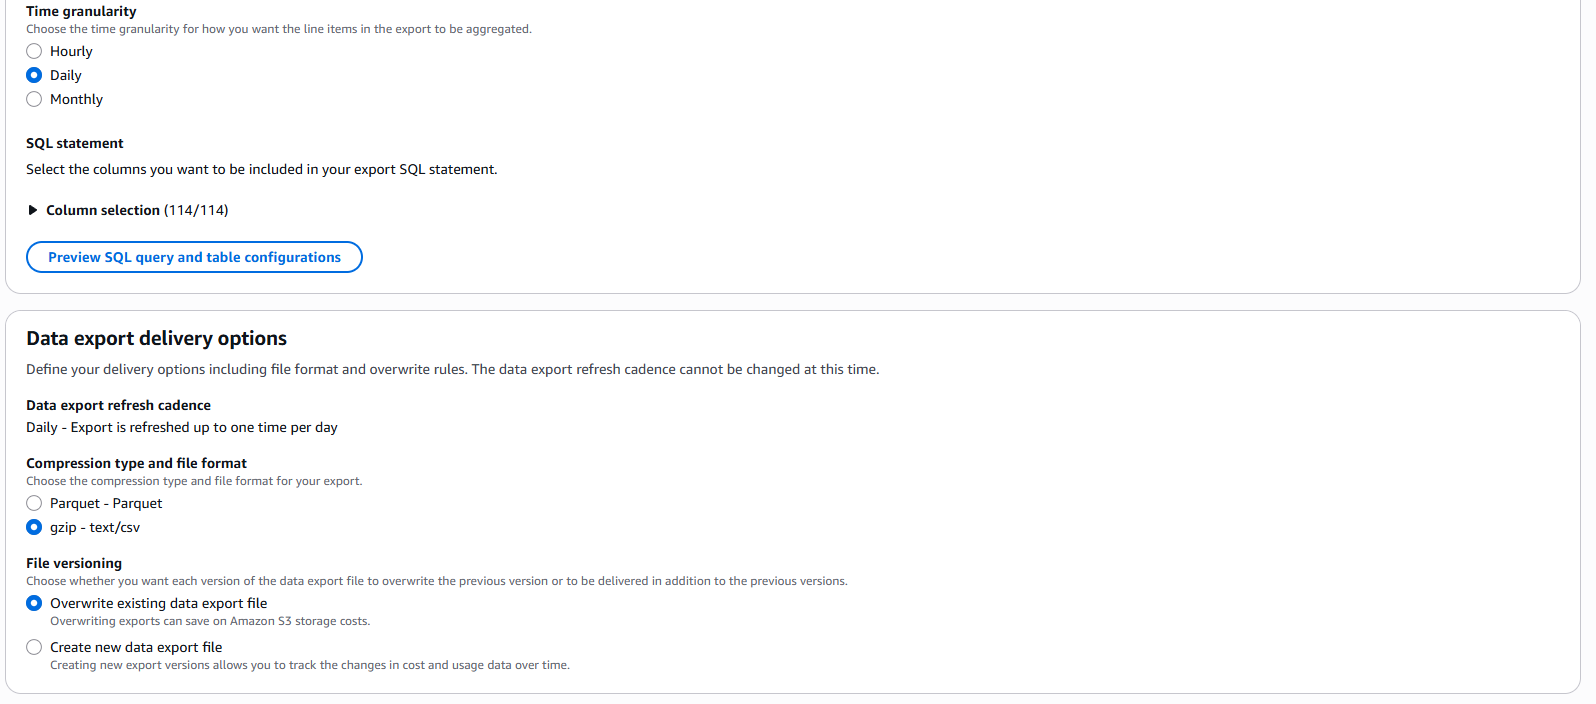
Select "Daily" time granularity and leave the column selection as the default (114/114).
Next choose gzip - text/csv as the compression and file format, and make sure to select "Overwrite existing data export file".
Complete the Data export storage settings.

The reports are saved into the S3 bucket you nominate. We advise that whichever S3 bucket you use, that it is dedicated for Cloud Ctrl integration, to help minimize access the platform receives. The S3 path prefix should be left empty.
Click Create, then review and click the Review and Complete button.
The reports will now be created and updated multiple times a day and dropped in the S3 bucket. It may take up to 24 hours for the first Cost and Usage Report to be delivered to this bucket, but you can complete the rest of the configuration without them present.
If you want tags to be associated with your data in Cloud Ctrl then you will need to ensure that you have enabled those tags.
Enable tags in billing reports
AWS requires that tags are activated for billing reports, this can be done via configuring Cost allocation tags in the Billing console. Without this step your data will be wholly untagged in Cloud Ctrl.
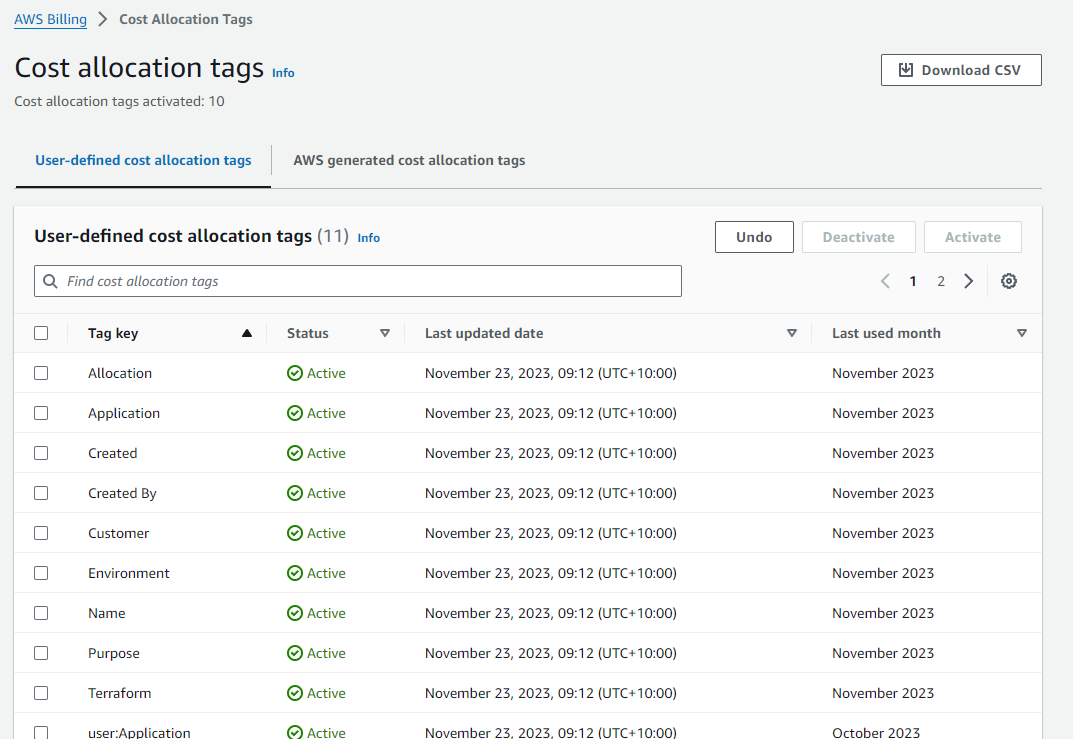
Caution
For a tag to be present in the billing reports it needs to have an Active status.
Grant Cloud Ctrl Access
With the above configuration complete you should now have Cost and Usage Reports either in the bucket already or on their way. In any case you can complete the configuration of the AWS connection irrespective of whether they've been delivered yet.
Cloud Ctrl supports two different access methods: AWS AssumeRole Cross-account sharing, and direct IAM Credential based access. Both will continue to be supported into the future, however our recommended option is to use the AssumeRole credential as it has no expiry date and therefore won't require you to renew access each year.
Create Policy
Irrespective of the connection strategy you choose, you'll need to first create a Policy which defines the access that Cloud Ctrl will have over your account. To do this navigate to IAM / Policies / Create Policy and create a new policy.
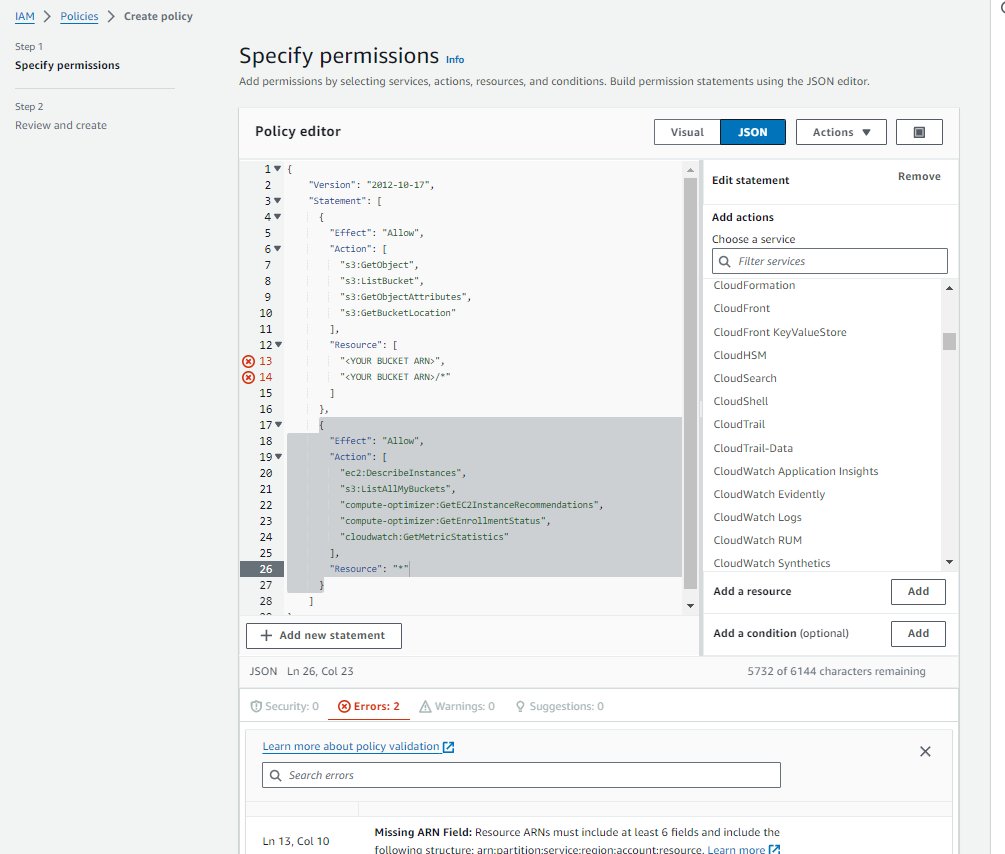
The following policy definition is our recommended access requirement:
{
	"Version": "2012-10-17",
	"Statement": [
      {
        "Effect": "Allow",
        "Action": [
          "s3:GetObject",
          "s3:ListBucket",
          "s3:GetObjectAttributes",
          "s3:GetBucketLocation"
        ],
        "Resource": [
          "<YOUR BUCKET ARN>",
          "<YOUR BUCKET ARN>/*"
        ]
      },
      {
        "Effect": "Allow",
        "Action": [
          "ec2:DescribeInstances",
          "s3:ListAllMyBuckets",
          "compute-optimizer:GetEC2InstanceRecommendations",
          "compute-optimizer:GetEnrollmentStatus",
          "cloudwatch:GetMetricStatistics",
          "ec2:DescribeCapacityReservations",
          "ec2:DescribeReservedInstances",
          "savingsplans:DescribeSavingsPlans",
          "ce:GetSavingsPlansUtilizationDetails",
          "ec2:DescribeHostReservations",
          "ce:GetReservationUtilization"
        ],
        "Resource": "*"
      }
    ]
}
Note: You will need to replace the text <YOUR BUCKET ARN> with the ARN of the S3 Bucket you configured to deliver the Cost and Usage Reports to. S3 Bucket ARNs are in the form arn:aws:s3:::BUCKET_NAME.
Option 1: AssumeRole Credential
At a high level how this connection works: Cloud Ctrl maintain our own AWS account that we have permissions to make requests for usage data. You can grant permission to our AWS Account, which then allows our platform to request your data on your behalf. It is possible to scope this access, such that our AWS Account only has permission to read from the AWS Services and S3 Buckets you nominate.
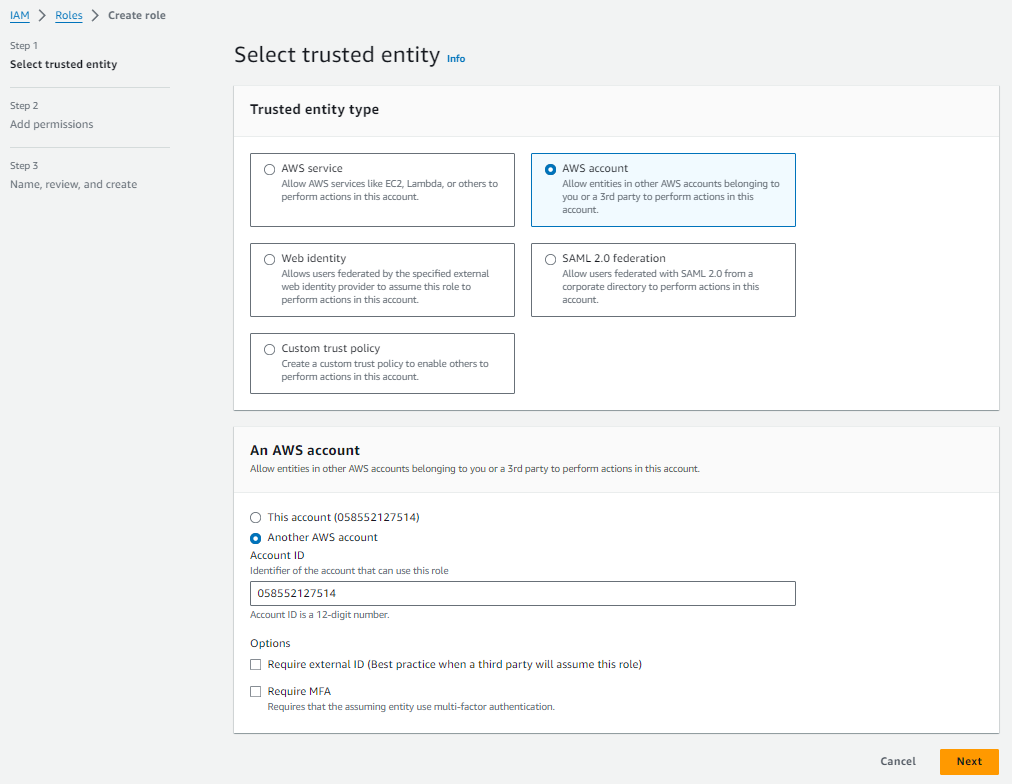
The first step is to create a role that the Cloud Ctrl account will be able to assume to access your resources. You can do this by navigating to IAM / Roles / Create Role and creating a new role.
The trusted entity type should be "AWS Account", and the account should be the hardcoded number 058552127514 which is the identifier of the Cloud Ctrl AWS account used to request Cost and Usage report data.
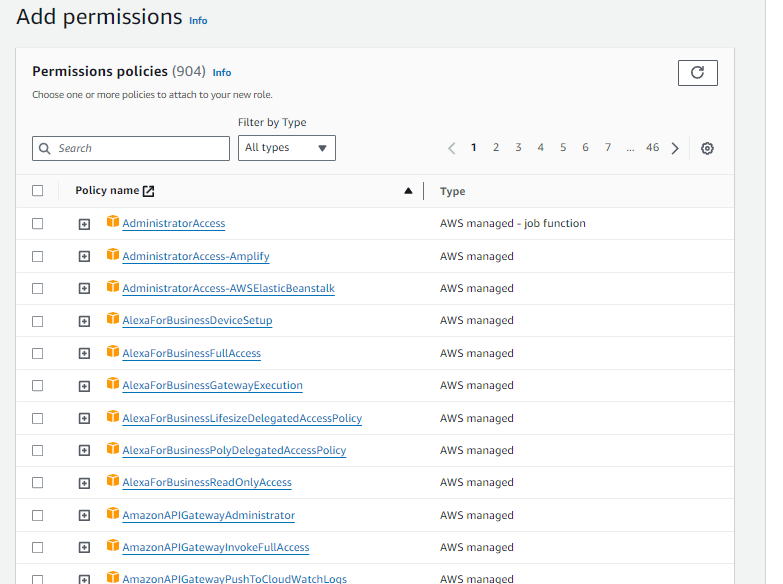
Next select the policy you created ealier:
Option 2: Direct IAM Access
Another option is to generate an IAM user directly in the AWS IAM console. We recommend against this option for a few reasons:
- There is a hard cap to the maximum expiry of the secret keys you can share with us. As a result you will need to reconnect this account with refresh keys every 1 year.
- There is a little more complexity in the configuration.
That said this connection type is not going anywhere and will be supported for the forseeable future.
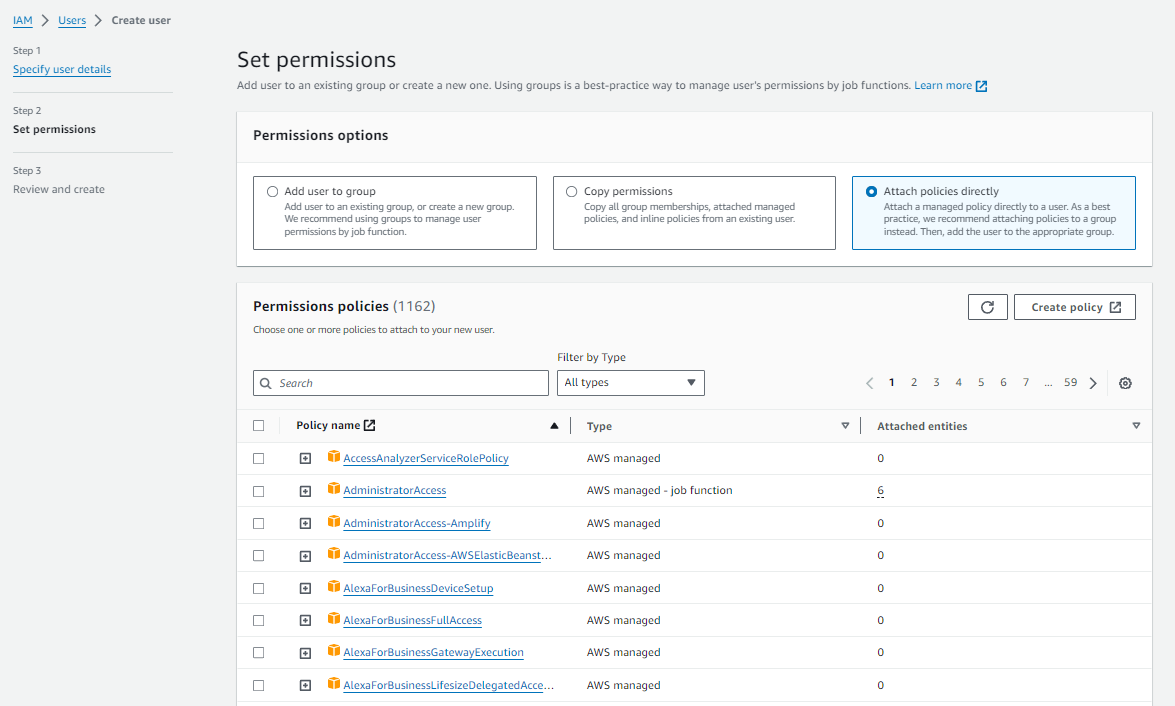
If you choose to go this route, the first step is to create a new user for the Cloud Ctrl connector. We recommend naming it in a way that will help you remember who will be access data through this account. To do this navigate to IAM / Users / Create User.
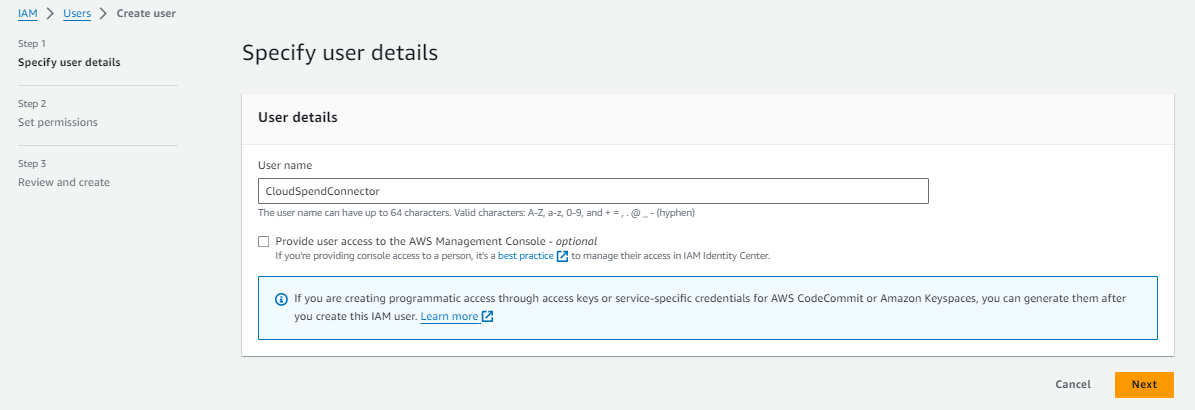
Click Next: Permissions
Cloud Ctrl needs access to S3 storage to list and read, as well as some other access for additional metadata. After hitting next you can grant this user the necessary access by attaching the policy created in previous steps.
Then review and create the user.
Finally, Add a Credential and Cloud Account
Upgrading to CUR 2.0
If you already have an AWS connection created in Cloud Ctrl for the legacy CUR format, you can simply tick the 'CUR2.0 Report', to switch to using the CUR2.0 format standard. You will still have to create the CUR2.0 export in AWS, but you do not have to make a new AWS credential in Cloud Ctrl.
Add a Credential
- Go to Settings → Cloud Connections → Amazon Web Services
- Click + Add Credential
Option 1: Assume Role Credential
If you configured an assume role credential, you'll need to enter the following information:
Cur2.0 Report: Specifies that you have setup a CUR2.0 schema export type in the AWS CLI (as above).
Role ARN: The ARN (Amazon Resource Notation) of the Role configured earlier. You find this value by navigating to IAM / Roles, selecting the role you created and opening the properties tab.
Account ID: This can usually be inferred from the Role ARN, and will be by the UI automatically. However if you have a more complex configuration then you can override this Account ID to be whatever your preferred ID is.
Session Name: This is an identifier that is passed to the AWS API by the Cloud Ctrl process. This value can be anything, just make sure it's something useful to you for tracking.
S3 Region / BucketName: You need to provide the name of the bucket and the region it lies in.
Option 2: IAM Based Credential
Conversely if you configured an IAM Based Connection, you will need to create a secret key for the user configured in previous steps and supply it.
Cur2.0 Report: Specifies that you have setup a CUR2.0 schema export type in the AWS CLI (as above).
Access Key ID / Secret Access Key: You will need to create a new Access Key ID / Secret Key pair for the Cloud Ctrl process to connect with. You can create new keys by navigating to IAM / Users, selecting the user you configured earlier, and navigating to the Security Credentials tab. In there is a section Access Keys where you can create up to 2 active access keys. When creating a key select "Application running outside AWS" and then copy the details into this form.
S3 Region / BucketName: You need to provide the name of the bucket and the region it lies in. The UI will attempt to search for the bucket you nominated, if it can't find it it means that you haven't granted
s3:ListAllMyBucketsas part of the policy definition.
Add a Cloud Account
Once your credential is saved, you need to add a Cloud Account to start importing data:
- From Settings → Cloud Connections → Amazon Web Services, scroll down to the Cloud Accounts section
- Click + Add Cloud Account
- Select the credential you just created
- Enter the S3 bucket details for your CUR 2.0 export
- Click Submit
Finished!
Your credentials are tested before they are accepted, so if the configuration process succeeds then there's nothing left for you to sit back and wait. Cloud Ctrl will immediately start trying to import what Cost and Usage Reports are already configured in your platform, if there's none there yet then you might need to wait up to 24 hours for those to come through first.
If we detect an issue on our end, we try to resolve them within 24 hours, otherwise you can expect us to reach out if anything has been incorrectly configured.
If you're having any trouble connecting your AWS account to the platform please reach out to support via the portal, we are happy to help!